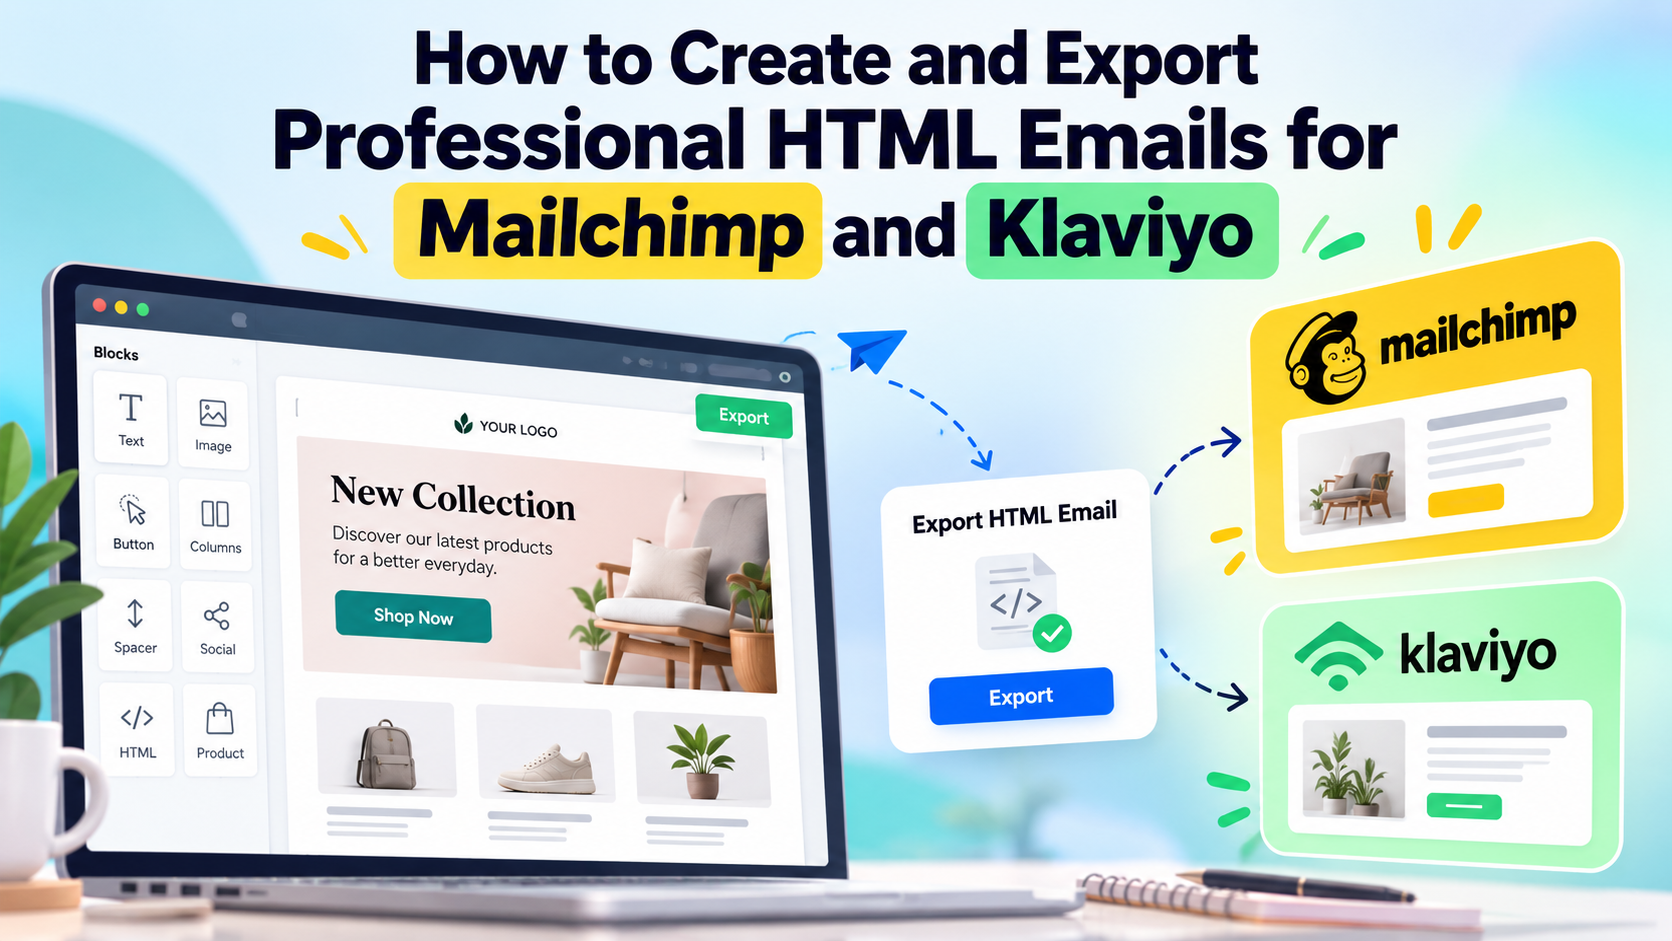
How to Create and Export Professional HTML Emails for Mailchimp and Klaviyo
Creating a professional marketing email is only half of the job.
The other half is making sure the finished design can move smoothly into the email marketing platform your team actually uses.
For many businesses, that platform is Mailchimp or Klaviyo.
Both platforms support powerful email marketing workflows, but marketers often need more flexibility during the design stage. Teams may want reusable content blocks, branded layouts, responsive product sections, custom promotional banners, or templates that can be adapted across multiple campaigns.
A well-planned workflow lets you design the email first, keep branding consistent, test the layout, and then move the finished HTML into Mailchimp or Klaviyo for campaign setup, segmentation, automation, and sending.
This guide explains how to create professional HTML emails for both platforms and what to check before exporting them.
Start With the Goal of the Email
Before choosing a template or designing the layout, define exactly what the email needs to accomplish.
Your campaign may be designed to:
- Welcome a new subscriber
- Promote a product
- Announce a sale
- Share a newsletter
- Recover an abandoned cart
- Launch a new collection
- Promote an event
- Introduce a new feature
- Re-engage inactive customers
- Follow up after a purchase
The goal should determine the structure.
A newsletter might need several content blocks.
An abandoned-cart email may need a product-focused layout with one dominant CTA.
A product launch could require a large hero section followed by feature blocks.
A promotional message may work better with a short offer and a highly visible button.
Choosing the goal first prevents you from creating an attractive email that does not support the campaign objective.
Choose the Right Way to Build Your Email
Once the objective is clear, decide how the email will be created.
There are several common approaches.
Build the HTML Manually
Hand coding gives developers detailed control over markup, layout, and styling.
This approach can work well when a business has dedicated email development resources or highly specific technical requirements.
However, manually rebuilding similar layouts for every campaign can become inefficient.
Start With a Ready-Made Template
A template provides an existing structure that can be customized for the campaign.
This is useful for newsletters, promotional emails, onboarding campaigns, product announcements, and ecommerce messages.
Use a Visual HTML Email Builder
A visual HTML Email Builder can make the design process easier for teams that want professional HTML emails without manually coding every section.
Marketers can work with elements such as:
- Text blocks
- Images
- Buttons
- Columns
- Product sections
- Dividers
- Social links
- Custom HTML
- Reusable modules
This approach is especially useful when the design is created separately and later exported into Mailchimp, Klaviyo, or another email platform.
Build the Email Around a Reliable Structure
Professional HTML emails usually follow a predictable content hierarchy.
A common structure is:
- Preheader
- Brand header
- Hero section
- Main message
- Primary CTA
- Supporting content
- Product or feature blocks
- Secondary CTA
- Footer
- Preference and unsubscribe information
Not every campaign needs every section.
A simple promotion may only require:
Header → Hero → Offer → CTA → Footer
A newsletter could use:
Header → Featured Story → Supporting Articles → Resources → CTA → Footer
The structure should always support the purpose of the email.
Design for Mobile From the Beginning
Subscribers may open the same campaign on desktops, tablets, or mobile phones.
The design therefore needs to adapt naturally across different screen sizes.
Pay particular attention to:
- Content width
- Font sizes
- Button dimensions
- Image scaling
- Column behavior
- Product grids
- Spacing
- Navigation
- Footer layout
Single-column layouts are often easier to adapt to mobile.
If the design uses multiple columns, make sure they stack logically on smaller screens.
For example, a product image should remain close to its description and CTA when the layout changes.
Mobile optimization should be part of the original design rather than something added at the end.
Create a Strong Visual Hierarchy
Subscribers rarely read marketing emails word by word.
Most people scan first.
Your design should make the most important information obvious.
A useful hierarchy is:
Brand
Who sent the email?
Headline
What is this message about?
Value
Why should the reader care?
CTA
What should they do next?
Supporting information
What else is useful?
Typography, spacing, color, image placement, and section order can all help establish this hierarchy.
Avoid giving every element the same visual importance.
If five buttons, three banners, and several headlines are all competing for attention, the reader may not know what action matters most.
Create a Focused Hero Section
The hero is usually the first major content section.
It should communicate the main campaign message quickly.
A strong hero may contain:
- Short headline
- Supporting sentence
- Relevant image
- Offer or benefit
- Primary CTA
For example:
New Season. New Collection.
Explore our latest products designed for everyday comfort.
Shop the Collection
The message is immediately understandable.
That is usually more effective than filling the opening section with multiple offers and several competing actions.
Make the Primary CTA Obvious
Every campaign should have a clear next step.
Instead of vague CTA text such as:
Click Here
consider using wording that tells readers what will happen:
- Shop the Collection
- Explore New Arrivals
- Read the Guide
- Reserve Your Place
- View the Product
- Start Shopping
- Discover What’s New
- Complete Your Order
CTA buttons should also be easy to use on mobile.
Give them enough padding and enough space from surrounding content.
Build Reusable Email Components
One of the most effective ways to improve campaign production is to create reusable content blocks.
These can include:
- Headers
- Hero sections
- Product cards
- CTA blocks
- Testimonials
- Article previews
- Offer banners
- Dividers
- Social sections
- Footers
Instead of recreating these elements for every Mailchimp or Klaviyo campaign, teams can maintain approved versions and reuse them.
For example, an ecommerce team might keep a reusable product card with:
Product image
Product name
Short description
CTA
Another reusable block might contain:
Promotion headline
Offer details
CTA
This creates a modular design system that can support many different campaigns.
Professional HTML Emails for Mailchimp
Mailchimp can support newsletters, promotional campaigns, customer journeys, product announcements, events, ecommerce communication, and other types of campaigns.
That means it is useful to maintain several different layouts rather than forcing every message into one template.
Teams that want a ready-made starting point can browse Mailchimp email templates and customize the structure to match their brand and campaign.
Useful Mailchimp Email Templates to Keep Ready
A practical template library could include several core layouts.
Newsletter Template
Useful for:
- Articles
- Company news
- Educational content
- Monthly updates
- Industry insights
- Resource roundups
Promotional Template
Useful for:
- Sales
- Discounts
- Seasonal campaigns
- Product promotions
- Limited-time offers
Welcome Template
Useful for:
- New subscribers
- New leads
- Community signups
- New customers
Product Announcement Template
Useful for:
- Product launches
- New collections
- Feature releases
- Service updates
Event Template
Useful for:
- Webinars
- Workshops
- Conferences
- Product demonstrations
- Registrations
These templates can use the same typography, colors, buttons, header, and footer while adapting the main body to the campaign.
Prepare the Email Before Exporting to Mailchimp
Before moving the finished email into Mailchimp, review the entire design.
Check:
- Headlines
- Images
- CTA destinations
- Product links
- Mobile behavior
- Alt text
- Footer information
- Placeholder text
- Brand colors
- Promotional details
- Product information
You should also identify content that will be completed inside Mailchimp.
This may include platform-specific personalization, audience information, tracking, preference links, or other campaign settings.
The template handles the visual structure.
Mailchimp handles the campaign configuration and sending workflow.
Keep Mailchimp Templates Editable
Reusable Mailchimp emails should not become rigid.
The team should be able to replace:
- Headlines
- Images
- Products
- Offers
- Buttons
- Links
- Articles
- Event details
without redesigning the entire email.
This is particularly useful for newsletters.
A newsletter can retain the same branded framework while new stories and resources are added for each send.
Professional HTML Emails for Klaviyo
Klaviyo is commonly used for ecommerce, retention, and lifecycle email marketing.
That means Klaviyo templates often need to support multiple stages of the customer journey.
Ready-made Klaviyo email templates can provide starting layouts for campaigns such as:
- Welcome emails
- Promotional campaigns
- Abandoned cart emails
- Browse abandonment
- Product recommendations
- Product launches
- Post-purchase emails
- Win-back campaigns
- Loyalty messages
- Review requests
- Customer follow-ups
Each of these messages has a different objective.
The template should reflect that.
Design Klaviyo Emails Around Lifecycle Intent
A welcome email and an abandoned-cart email should not use exactly the same structure.
Welcome Email
A useful layout could be:
Welcome → Brand Introduction → Key Benefit → CTA
Abandoned Cart Email
Consider:
Reminder → Product → Supporting Message → Return-to-Cart CTA
Product Recommendation Email
A simple structure might be:
Headline → Recommended Products → Product CTAs
Post-Purchase Email
Consider:
Thank You → Purchase Information → Helpful Content → Next Action
Win-Back Email
The structure could be:
Return Message → Reason to Re-engage → CTA
Branding can remain consistent across all of these emails while the information hierarchy changes.
Keep Ecommerce Templates Product-Friendly
Klaviyo campaigns frequently revolve around products.
Product sections should therefore be easy to scan.
A typical product block may include:
- Product image
- Product name
- Short description
- Price or promotional information
- CTA
Avoid adding too many products just because the template gives you enough space.
A small number of clearly presented products can create a cleaner experience than an overcrowded grid.
Exporting Your Finished HTML Email
Once the design is complete, the next step is moving it into the destination platform.
The exact workflow may vary, but a reliable process usually follows these stages.
Step 1: Finish the Design
Complete the email before export.
Remove:
- Placeholder copy
- Temporary images
- Empty sections
- Dummy buttons
- Test links
Step 2: Preview the Email
Check both desktop and mobile versions.
Look for:
- Unexpected spacing
- Text wrapping
- Oversized images
- Column issues
- Small buttons
- Alignment problems
Step 3: Review the HTML
If your workflow provides access to the HTML, check for obvious problems such as:
- Broken tags
- Incorrect image paths
- Missing URLs
- Unnecessary code
- Unsupported elements
Step 4: Choose the Destination
Select Mailchimp or Klaviyo based on where the campaign will ultimately run.
Step 5: Export or Import the Template
Move the completed design into your selected platform using the appropriate integration or HTML import workflow.
Step 6: Add Platform-Specific Content
Complete any necessary:
- Personalization
- Dynamic content
- Segmentation
- Automation settings
- Audience selection
- Tracking
- Campaign configuration
Step 7: Test Again
Always review the email after it reaches the final platform.
A successful export does not replace final testing.
Design Once and Adapt for Both Platforms
Businesses that use both Mailchimp and Klaviyo do not necessarily need two unrelated email design systems.
The same brand foundation can support both platforms.
Maintain consistent:
- Brand colors
- Typography
- Logo treatment
- CTA styles
- Headers
- Footers
- Product card designs
- Spacing rules
Then change the body according to the campaign.
For example:
Mailchimp Newsletter
Header
Featured article
Supporting stories
Resource CTA
Footer
Klaviyo Ecommerce Campaign
Header
Promotional hero
Product recommendations
Shopping CTA
Footer
The purposes are different, but the brand still feels consistent.
Create a Master Email Design System
Instead of letting every campaign develop independently, maintain an approved design system.
Typography
Define styles for:
- Main headings
- Secondary headings
- Body copy
- Captions
- CTAs
Colors
Document:
- Primary brand color
- Secondary colors
- Text colors
- Background colors
- CTA colors
Buttons
Keep consistent:
- Padding
- Font treatment
- Border radius
- Alignment
Images
Define standard approaches for:
- Hero images
- Product images
- Article thumbnails
- Promotional banners
Components
Maintain reusable versions of:
- Headers
- Footers
- Product cards
- Content blocks
- CTA sections
- Social sections
This makes it much easier to create campaigns across Mailchimp and Klaviyo without losing consistency.
Review Platform-Specific Elements After Export
Portable HTML provides the visual framework, but Mailchimp and Klaviyo may handle dynamic content differently.
Review elements such as:
- Personalization fields
- Subscriber information
- Product data
- Dynamic recommendations
- Conditional content
- Unsubscribe links
- Preference management
- Tracking
- Automation logic
These elements should be configured and tested in the platform that will actually send the email.
Test the Final Email in Real Inboxes
Email clients do not always render the same HTML identically.
Before a major campaign, review the final version in inboxes relevant to your audience.
Common environments include:
- Gmail
- Outlook
- Apple Mail
- Mobile email apps
Check:
- Typography
- Images
- Buttons
- Spacing
- Columns
- Backgrounds
- Footer
- Links
- Dark mode
Testing is especially important after moving a template from one system into another.
Optimize Images Before Export
Large images can add unnecessary weight to an email.
Before exporting:
- Resize oversized assets
- Compress images
- Add meaningful alt text
- Make images responsive
- Verify image URLs
- Avoid placing all important copy inside graphics
Images should enhance the message rather than replace it.
For example, if a promotional graphic shows “30% Off,” consider including the offer as live text as well.
Keep the HTML Simple
Professional email code does not need to be overly complicated.
Avoid unnecessary:
- Scripts
- Advanced positioning
- Website-only effects
- Excessive nesting
- Unsupported interactions
The objective is not to create the most complicated HTML possible.
The objective is to create a reliable email that displays clearly in the inbox.
Build Templates for Future Campaigns
A good template should remain useful after one campaign ends.
For example, a promotional template created for one seasonal campaign could later support:
- Product launches
- Holiday promotions
- Flash sales
- Anniversary campaigns
- New collections
You may only need to change:
- Colors
- Images
- Copy
- Products
- Offer details
Similarly, a strong newsletter template can become a repeatable framework for monthly or weekly campaigns.
Reusable design turns one campaign asset into part of a long-term email system.
Pre-Export Checklist for Mailchimp and Klaviyo
Before exporting, confirm that:
- The email has one clear objective
- The primary CTA is easy to find
- The design matches your brand
- Mobile text remains readable
- Images resize properly
- Links work
- Placeholder content is removed
- Alt text is included
- Footer details are complete
- Product information is correct
- The email has been previewed
- Platform-specific content will be configured after export
- The final version will be tested before sending
Common Mistakes to Avoid
Designing Only for Desktop
Always check the mobile experience.
Exporting an Unfinished Design
Finish the reusable visual structure before moving it into the ESP.
Forgetting Personalization
Review dynamic content and personalization after the email reaches Mailchimp or Klaviyo.
Using Too Many CTAs
Keep one main action clearly prioritized.
Rebuilding Similar Layouts Repeatedly
Create reusable components instead.
Skipping Post-Export Testing
Test the final email in the platform that will send it.
Final Thoughts
Creating professional HTML emails for Mailchimp and Klaviyo does not have to mean designing every campaign twice.
A more scalable approach is to build a reusable email design system first.
Start with the campaign objective.
Create a responsive layout.
Establish reusable branded components.
Keep the hierarchy and CTA clear.
Then export the completed design into Mailchimp or Klaviyo, configure the platform-specific campaign settings, and test the final email before sending.
Whether your team uses Mailchimp for newsletters, Klaviyo for ecommerce lifecycle campaigns, or both platforms for different parts of the customer journey, reusable HTML emails can help make campaign production faster, more consistent, and easier to manage.